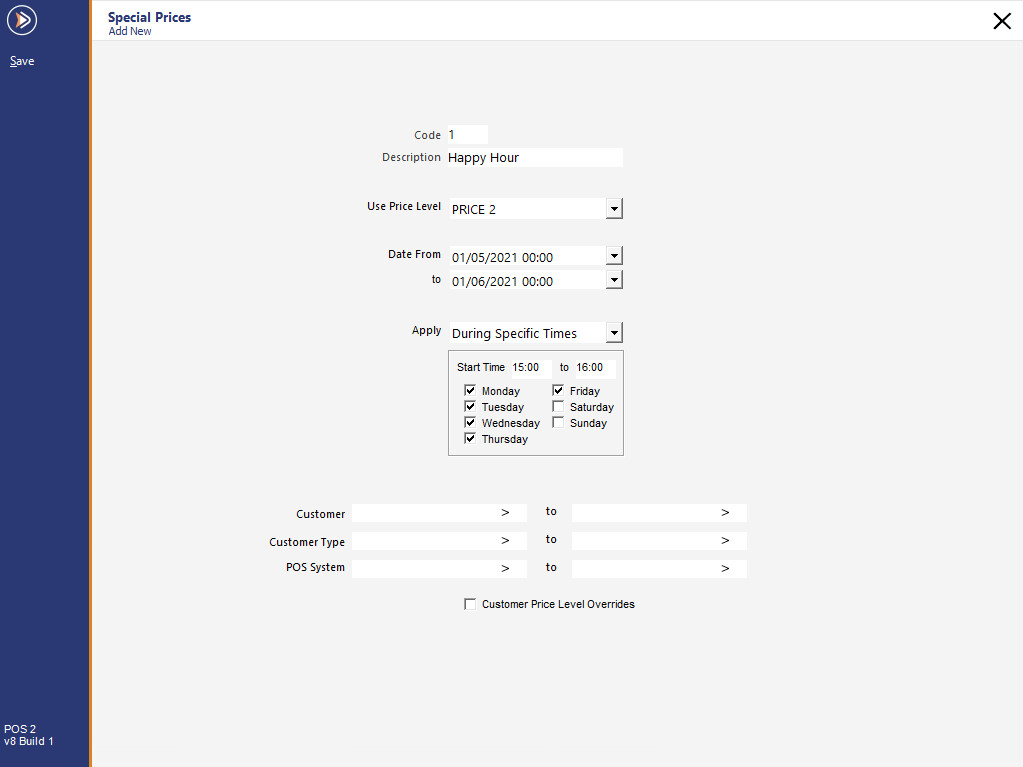
This feature is a way to offer a special price for the customers at a scheduled time.
This feature used to be primarily involved if you wanted to use it for Happy Hour and such, but since the advent of the Promotions and the myriad of features available, there hasn’t been much need to use this function.
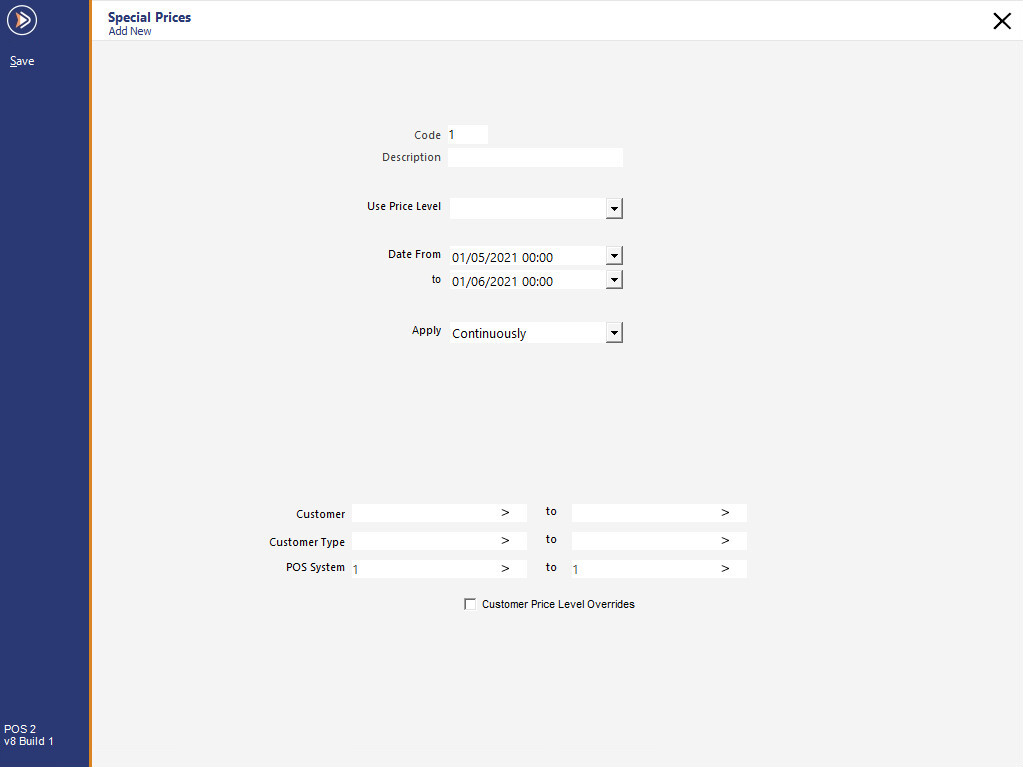
Any schedule can be linked directly to a price level for even greater control.
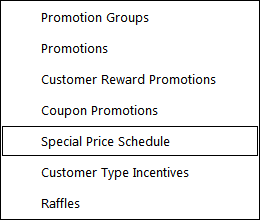
You can access this menu by going to File > Sales > Promotions > Special Price Schedule.
A new window will open allowing you to Add, Modify and Delete.
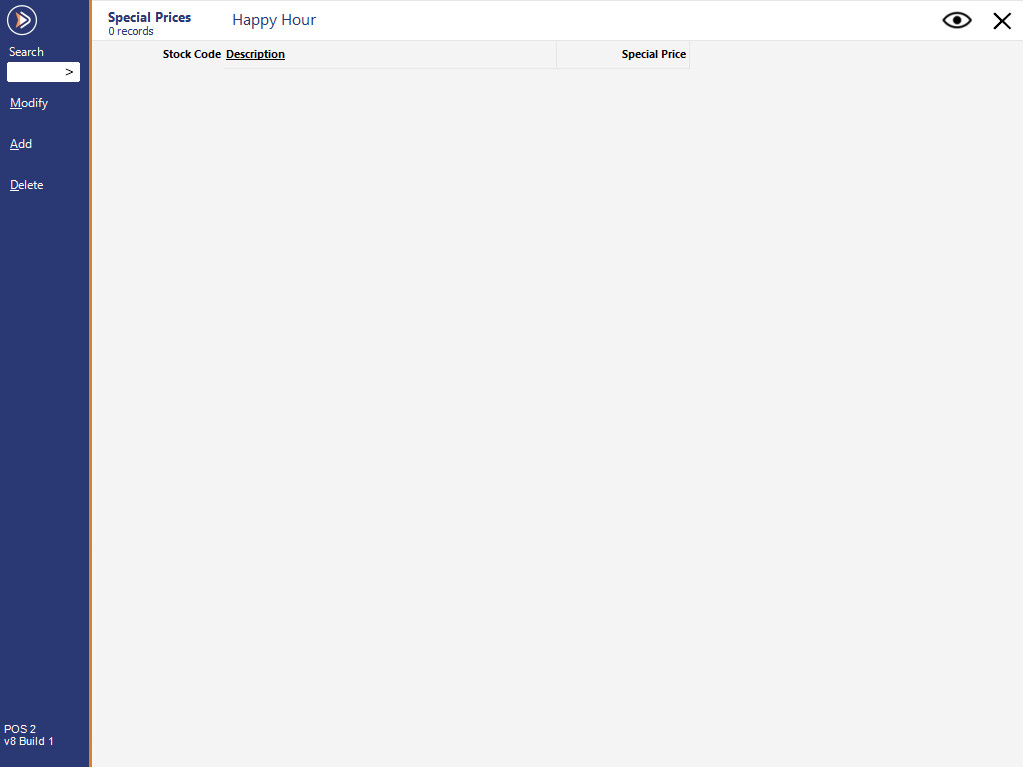
There is another button available called Specials, which is where you can add specific Stock Items that are not grouped by Departments.
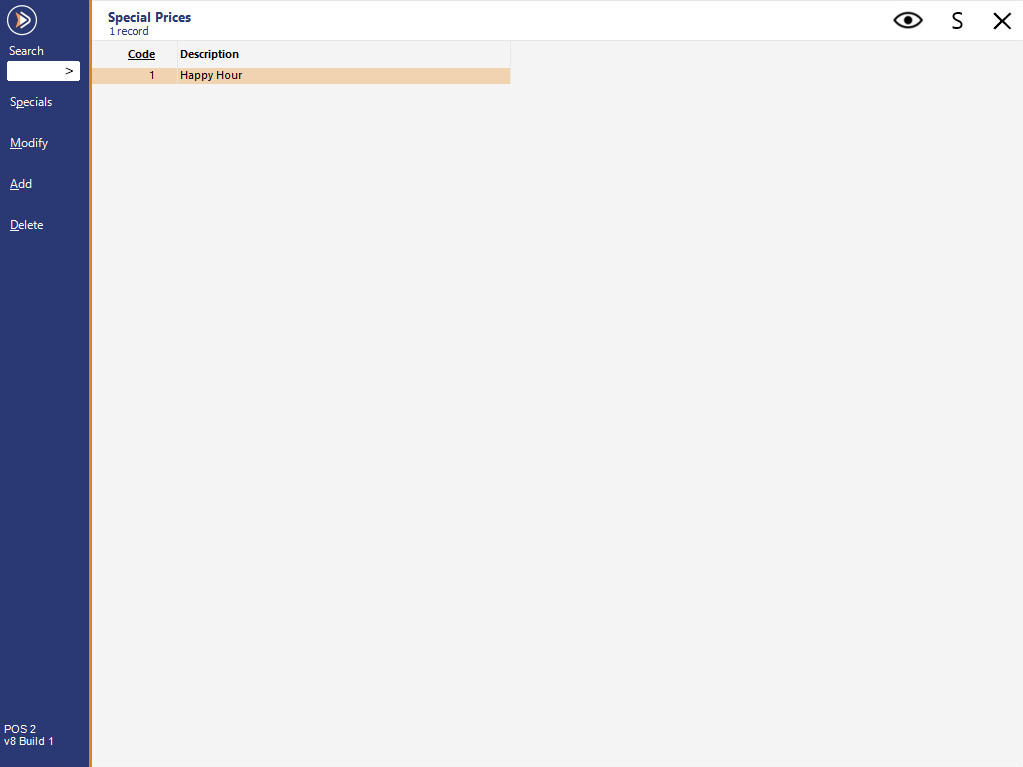
Press the Add button to create a new schedule.
Once a schedule has been created, they can be Modified or Deleted.
After saving the Special Price Schedule, it will be displayed in the Special Price Schedule list.
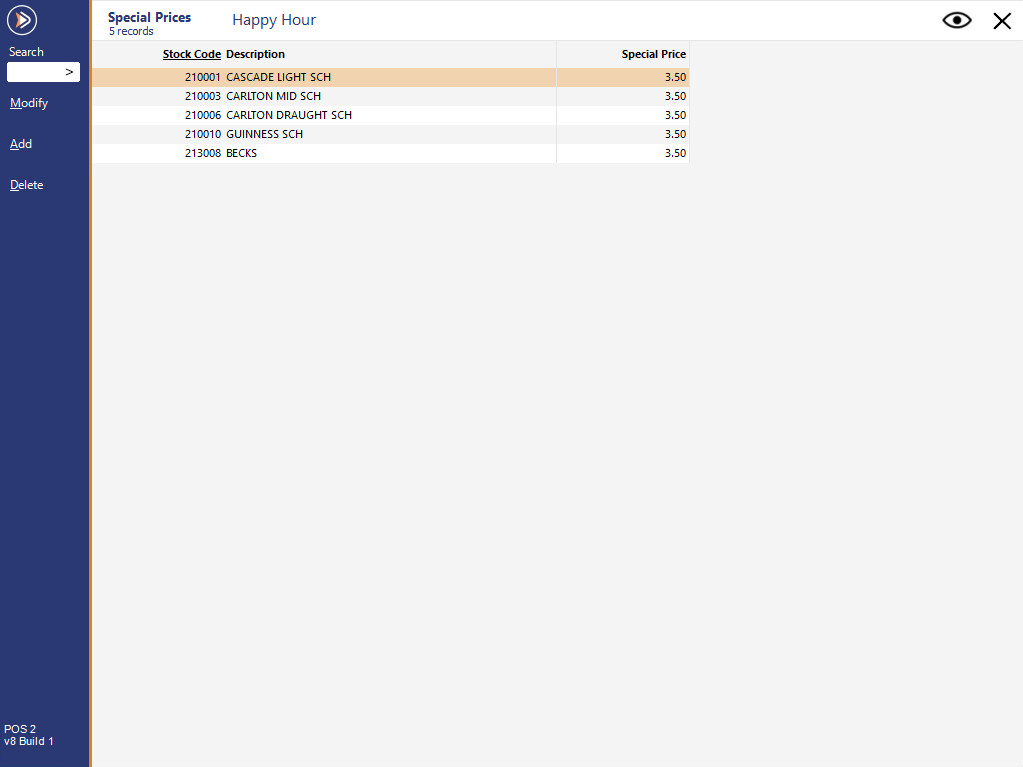
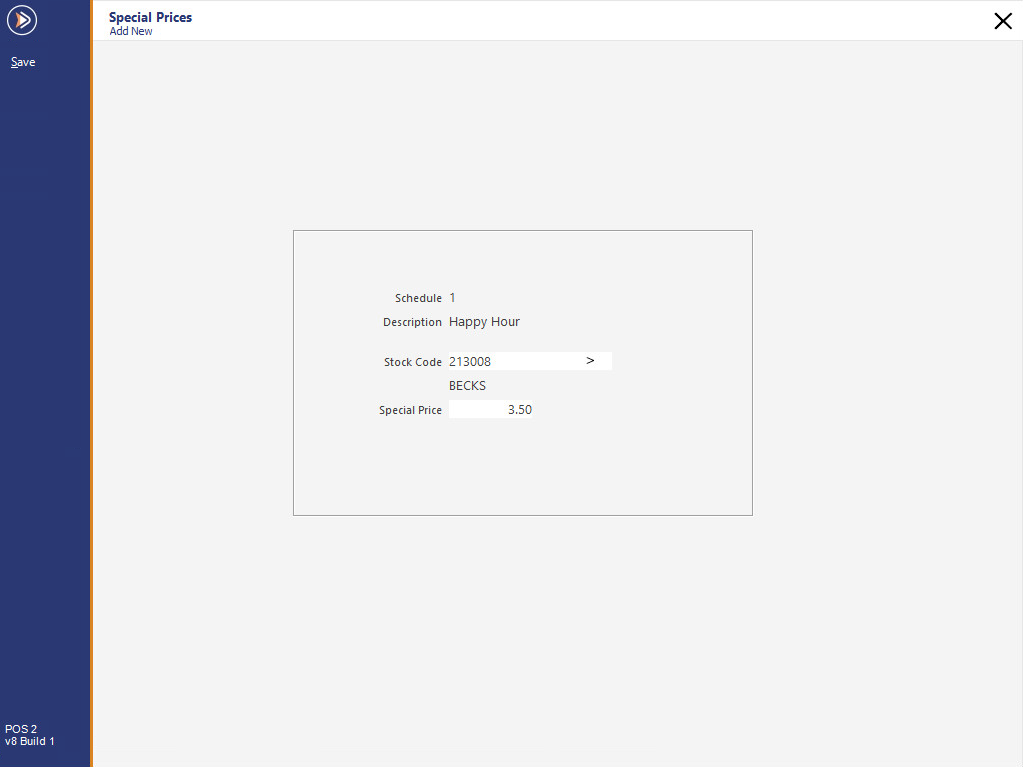
If specific special prices need to be assigned to Stock Items that will apply during the Schedule, highlight the Schedule in the list and press the Specials button.
Note!
Any Special Prices assigned to specific Stock Items in the window below will override the Sell Price that has been set for the Price Level selected in the Schedule.
E.g. Creating a Special Price Schedule to set Price Level 2
Cappuccino has a Sell Price of 2.00 in the Price Level 2 slot.
Adding Cappuccino to the Special Prices window below with a Sell Price of $1.50 will result in the Cappuccino Stock Item being sold at $1.50 while the Special Price Schedule is active.
Press the Add button to search for a Stock Item, and enter the price that you want to sell the item for.
Any Items that have been added to the Special Price Schedule will be sold using the Special Prices during the dates and times specified for any Customers, Customer Types and POS Terminals which are included in the Special Price Schedule.
Items that haven't been added to the Special Price Schedule will be sold using the Price Level that has been set for the Special Price Schedule (again, for any Customers, Customer Types and POS Terminals which are included in the Special Price Schedule).
In the event that an Item has been included in the Special Price Schedule and also has a price that matches the Price Level set for the Special Price Schedule, the Special Price that was entered in the Special Price Schedule will be used.
Tip!
When adding items to the Special Price Schedule, you can select multiple items at a time by holding down the CTRL key and clicking on each of the items that you want to select.
Or you can select a block of items by holding down the Shift key and clicking on the first item followed by the last item to select all items between the first and last selection.
When adding items using this method, you will need to edit each item individually to set the special price.
Once you have added all the items to the list that you want at the Special Price, they can be deleted or modified as required.